Pita Bread
The autumn after I graduated from college I spent two months living in Oregon, a little bit south of Eugene. I lived in a tent in the woods, a few hundred feet from Aprovecho Research Center. I often think of these two months as a magical time in my life. Have you ever had the experience of meeting a group of people and having them come together, get along, and interact in a way that could never have been planned but that couldn’t be much more perfect?
My experience that fall was quite unique. Spending my days with friends I had just met, planting seeds in a warm garden bed, milking goats, waking up under tall trees and drinking peppermint tea on cool mornings, gradually warmed by the sun. We made our own rocket stoves, chopped and hauled trees in sustainable forestry, saved so many seeds, felted hats, and learned a bit of blacksmithing. When were weren’t cooking and eating huge meals, riding bicycles, or learning about permaculture, we took walks, escaped to Crater Lake, and lounged in hot springs.
During those two months as interns we got a taste of so many sustainable living skills and a view of a unique and flourishing community that had grown up around Aprovecho. We learned about baking sour dough and took turns baking bread weekly. The local baker, who also taught us blacksmithing, had a beautiful oven for transforming dough into perfectly baked loaves of sourdough. The first time I ever made pita bread, we each got a small ball of dough to flatten into a round disk. In the hot oven they puffed up into a pocket of hot air surrounded by perfectly cooked dough. No matter what kind it is, there’s not much better than eating fresh warm bread.

Pita bread is especially delightful in the way that it puffs up into a pocket with very little work or effort on the part of the baker. The yeast and the heat take care of it for us. Around here this week, it really feels like fall. The weather is perfect for baking bread, watching the clouds and letting my mind wander to memories and feelings from autumns past.
I’ve made pita bread many times since my first experience, quite a few Septembers ago. Its a great bread to have around for lunches, easy to stuff with whatever fixings you like. In our continual challenge of figuring out what Ray should bring for lunch at work, I made a batch of pitas and a container of hummus for him to eat for a few days. Later this week I’ll share a recipe for falafel which is a wonderful filling for pita bread.

Whole Wheat Pita Bread
Adapted from How to Cook Everything Vegetarian, The Bread Bible, and New Recipes from the Moosewood Restaurant.
I am including measurements for the flours in ounces as well as cups. I think it is a much easier and of course more precise way to measure flours for bread, if you don’t have a scale you can use the cup measures, but I recommend finding an inexpensive scale for measuring when baking.
7.5 ounces (1 1/2 cups) whole wheat flour
7 ounces (1 1/2 cups) unbleached white flour
1/2 ounce (2 teaspoons) salt
2 teaspoons yeast (I use non-instant yeast, but instant yeast also works well)
1 ounce (2 tablespoons) olive oil
10.4 ounces (1 1/4 cups) water at room temperature
Measure all ingredients into a mixing bowl and combine, first stirring with a wooden spoon and then kneading with your hands. When all the ingredients have come together in a shaggy lump, knead briefly, then let the dough sit for 5 minutes.
Knead the dough for another five minutes, adding a little flour as needed to keep it from getting too sticky (add up to 1/4 cup of flour, but no more). After this kneading, the dough should be smooth and uniform and a little bit sticky.
Place the dough in an oiled bowl and cover with a dish towel or plastic wrap. Let it sit someplace warm until the dough doubles in size. If you want to wait to make the pita bread, you can refrigerate the dough at this point for up to 24 hours, just make sure it is covered well so it doesn’t dry out.
Once the dough has doubled in size (if refrigerating, remove and let sit for about an hour before continuing with this step), remove it from the bowl and divide into eight equal pieces (a knife or bench scraper is ideal for this, rather than tearing the dough). Gently roll each piece into a ball. Place the balls of dough about an inch apart on the counter, covered with a dish cloth and let them rise for about an hour.
During this hour, preheat the oven to 450 degrees. If you have a baking stone, place that in the oven when you preheat it. When the dough has again risen, not quite double in size, dust the counter with a little bit of flour. Shape each ball of dough into a flat circle, about six inches in diameter. You can carefully use a rolling pin or use your hands to gradually flatten them out. The pitas seem to puff up most successfully if the middle is equal to or slightly thicker than the sides of the flattened dough. Let this dough rest for about 20 minutes.
If using a baking stone, open the oven and place one or two dough circles on it. Try to work quickly so the heat doesn’t escape from the oven. If you are using a sheet pan, place two to three (or however many fit without touching) on the pan and place it in the oven. Bake for 3-4 minutes, until the pita is puffed up, but not browned. Sometimes, they don’t puff up. This could be because the oven is not hot enough. It might help to let the oven reheat for 5 minutes between batches. Even if they don’t have a pocket inside, they are still really good with any of your favorite fixings.
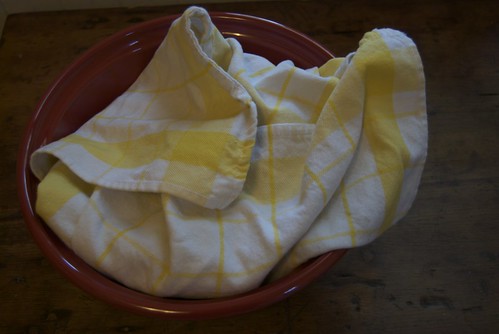
When you remove the pitas from the oven, place them in a clean dishtowel so they can stay warm and moist. If they are too browned or not covered they will dry out too quickly and be more difficult to stuff and eat.